Páginas

My Etsy

Monday, March 11, 2013


MINI BABY CARROT TUTORIAL
By: Helena Lima


Carrot's Body Shape:

You can start your carrot by getting 2.5 gr of a nice orange shape and just follow the direction:

1- shape into a ball, with no marks, very smooth and round

2- shape into a tear drop, with no marks and very smooth 

3- press your tear drop against the surface and make a sharp end for your carrot...... this will give a nice style to it

4- with a tool shaped as a tie or a knife with no teeth you mark the sides of your carrot........ my little trick is carving a short mark to one side and a long mark on the opposite side.

5- with a point tool I like to mark where the leaves will be placed. I also made a hole on the left-hand corner of my carrot as they are going to be used to decorate favor bags. The possibilities are endless. You can skip the hole and use your carrot as a magnet or applique.


Carrot's Leaf:

You can start your carrot's leaf by getting 1.5 gr of a nice green and follow the directions :

1- shape into a ball, with no marks, very smooth and round

2- shape into a tear drop, with no marks and very smooth 

3- press your tear drop against the surface 

12:01am

4- with a stick-shaped tool, mark both sides of the carrot by rolling the tool in one non-stop movement. Repeat the same technique for the 1 gram leaf.( it can be the brush holder or a lollipop stick) 

Let them sit and dry.


Painting:

Material Needed:

- white and darker orange acrylic paints
- angled brush and dotting pen 
- humidified cotton balls or wipes
For the leaves, I particularly love the 3-dot technique. By using white acrylic paint and my dotting pen, I apply the 3-dot technique on the corners of the leaves. (See picture)

For the leafs, I particularly love the 3-dots technique. By using white acrylic paint and my dotting pen, I apply the 3-dot technique on the corners of the leaves ( See picture)

For the carrots, I add a little bit of water to my bright orange paint and with the help of an angle brush, I fill in the details of the carrots. (See image)
For the carrots, I add a little bit of water to my bright orange paint and with the help of a angle brush, I fill in the details of the carrots. (See image)


I primarily work with cold porcelain, but you can apply the same technique when working with fondant, for example.

If you use this tutorial, I would love to hear from you!!!

Thank you so much for stopping by. Check back for more fun and easy tutorials!

Best,

Helena


Thursday, March 7, 2013


Easter / Spring 2013
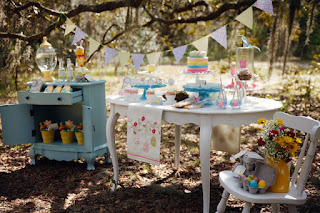
Twinkle Twinkle Little Party Shoot
by: Helena Lima 

Photography by: Bianca Schaefer Photography


Wednesday, March 6, 2013

Easter Collection 2013

By: Helena Lima


Hello Friends!!!!! 

Today I would like to invite you to come and see my creations for Easter. I have worked with Andressa Hara-Droham from Twinkle Twinkle Little Party. She is the sweetest girl ever. She is so creative and stylish that is incredible  Do be shy and go check out her site you will see what i'm talking about so graces, stylish and also fun...... You can see all that on her work and i had the  opportunity to work close with her on this project...... It was amazing

We have create some mini bunnies, carrot's lid jars and a large Chick dressed as a Bunny with bunny hats, booties and pom pom on his bum bum prop that looks great on any Spring / Easter Table.


Little message to my friend Andressa:

Andressa,

Thank you for the time you took making this mini shooting section with only my work. I'm so grateful for it. Love every single one.
You are amazing!!!!

XOXOX

Helena Lima


Saturday, March 2, 2013

First Time feature as VENDOR on AMY ATLAS

by Helena Lima

HAPPY SATURDAY EVERYONE!!!!!

I would like to share with you guys something that fantastic that happened to me yesterday.

I was fortune to be party of a fabulous dessert table with Spring Theme styled and idealized by Andressa Hara-Drohan from Twinkle Twinkle Little Party. I worked with her for weeks to come up with some items to her event. She gave me the wings all artist can wish to fly and create. For her event I made 3 little white and cute bunnies, 6 cap jars for party favors and one HUGE and adorable baby chick dressed as bunny with total height of 12"....... Her event is been feature at AMY ATLAS, a very well known blogger and party planner. I feel so blessed to be part of this great project. We were a total of 10 artists / vendors how have love for what we do ........... and when you do anything with love it come out great project that just give joy to our eyes.

So please click on the link below and check Andressa's Spring Party and also enjoy all the other posts she has their........ Enjoy and have lots of fun!!!!